ANPR Camera Configuration
Hikvision
Example
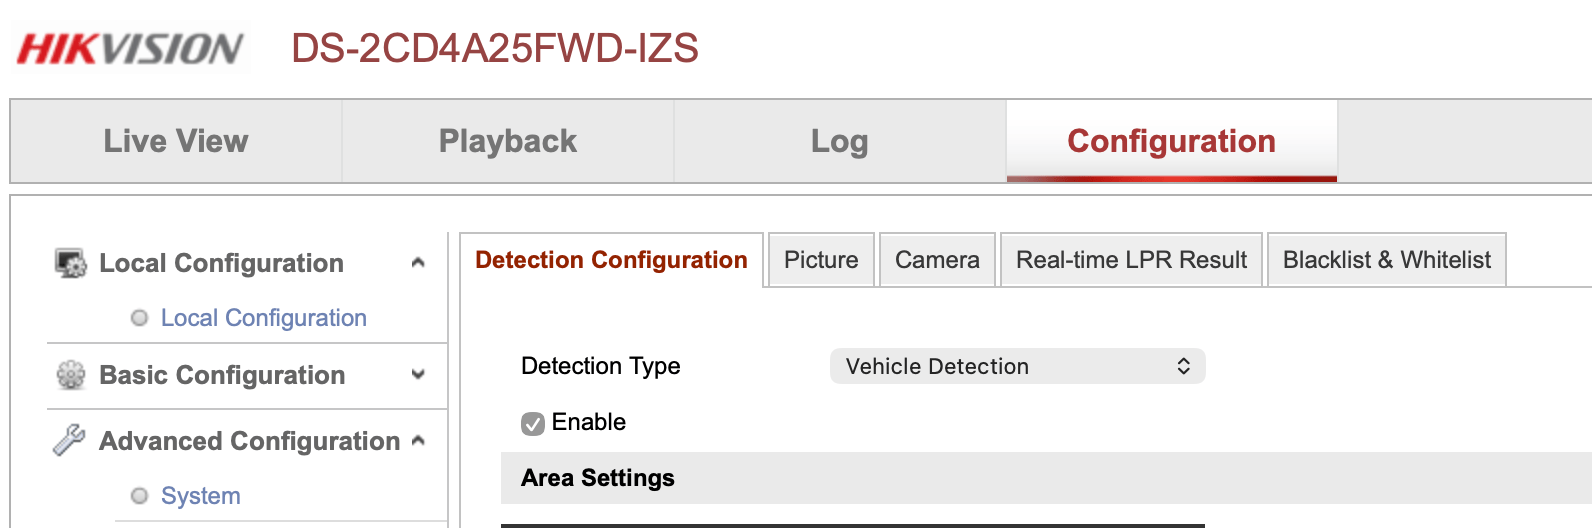
This example uses the DS-2CD4A25FWD-IZS, one of the very first ANPR enabled Hikvision cameras, on its own, without any NVR.
ANPR configuration, including posting images via ftp, is configured in the Road Traffic menu under Advanced.
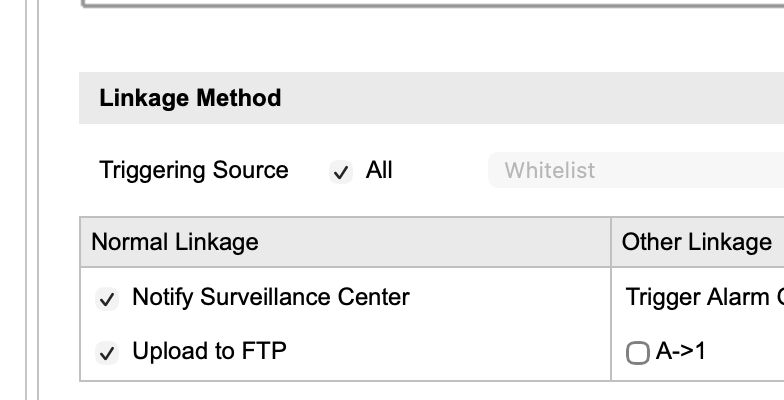
At the bottom of the page is the configuration for actions upon detecting a plate.
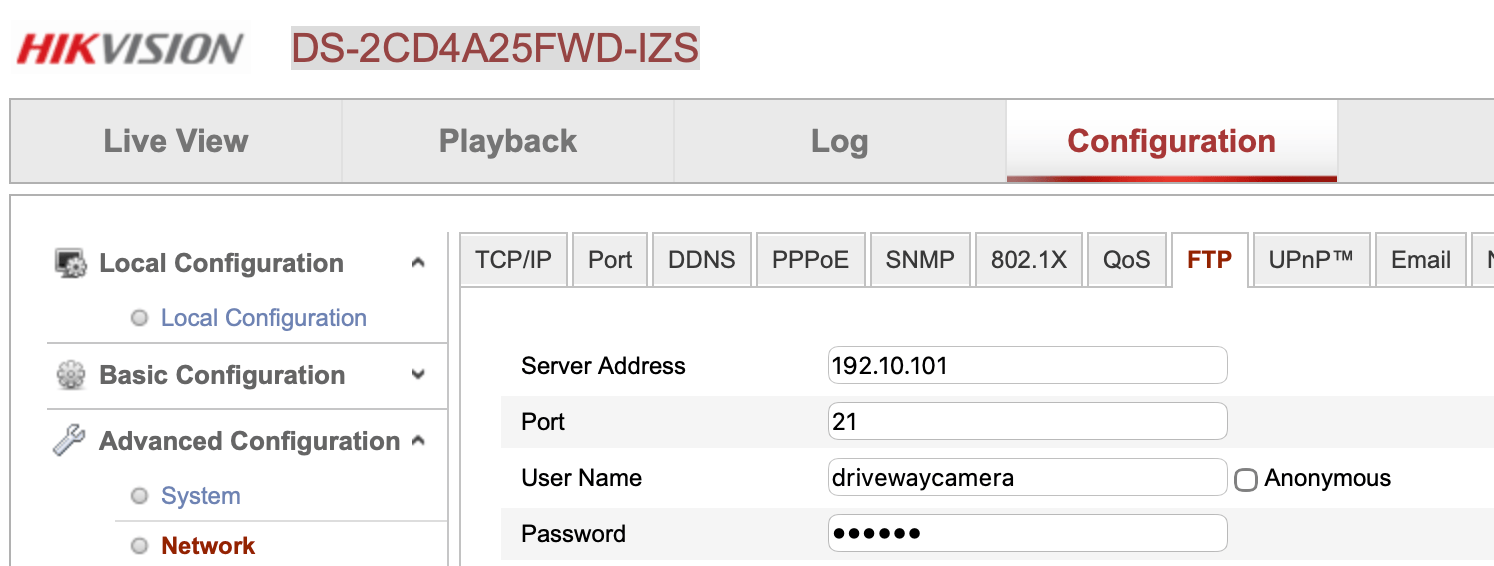
The server name, user name and password, and upload directory for this ftp are set once for all ftp actions in the Network menu under Advanced Configuration.
Some of the results of the recognition algorithm are available either on the picture and/or as part of the image file name. Direction is one that's only available with this model on the image. Its also possible to play with text colour here, although anpr2mqtt will optionally invert the colours pre-scan, so its possible to leave it as white text on black background to be clearer for humans to read.
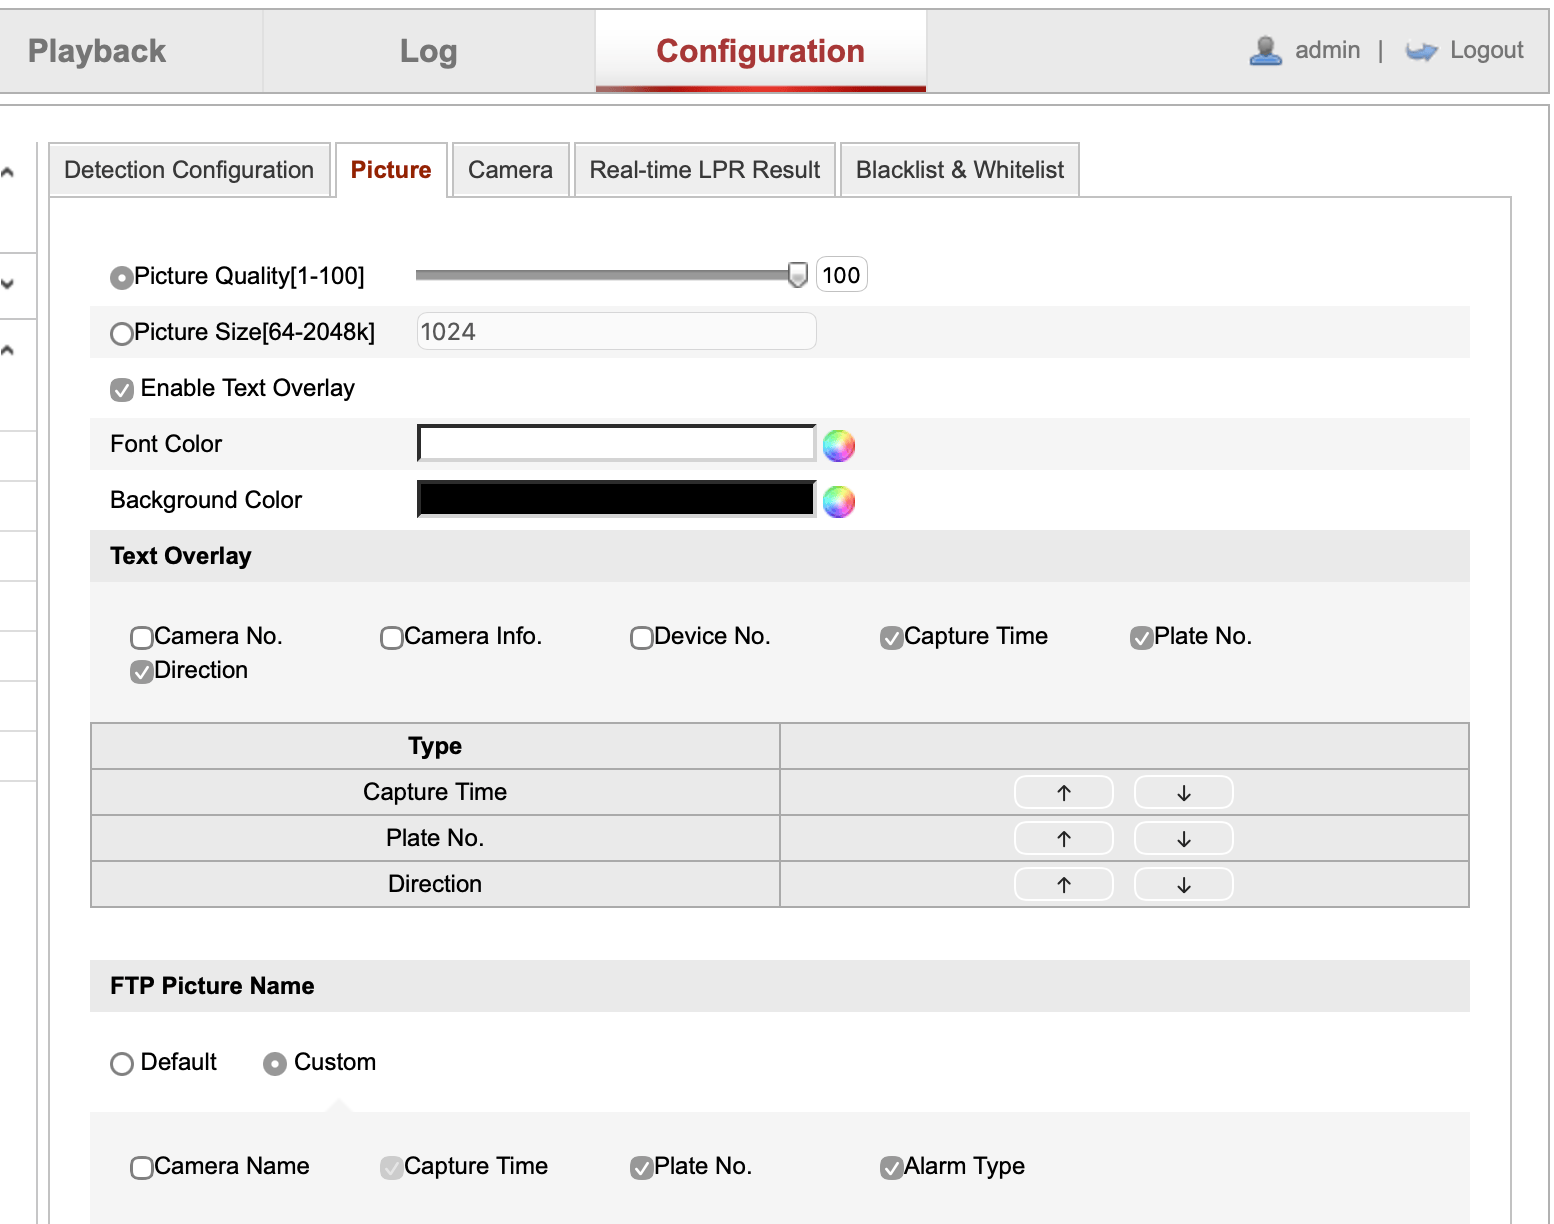
The file name format is configurable, it should have the licence plate included and the timestamp to work with the default anpr2mqtt regular expression. There's no need to include camera number if there's only one ANPR camera.
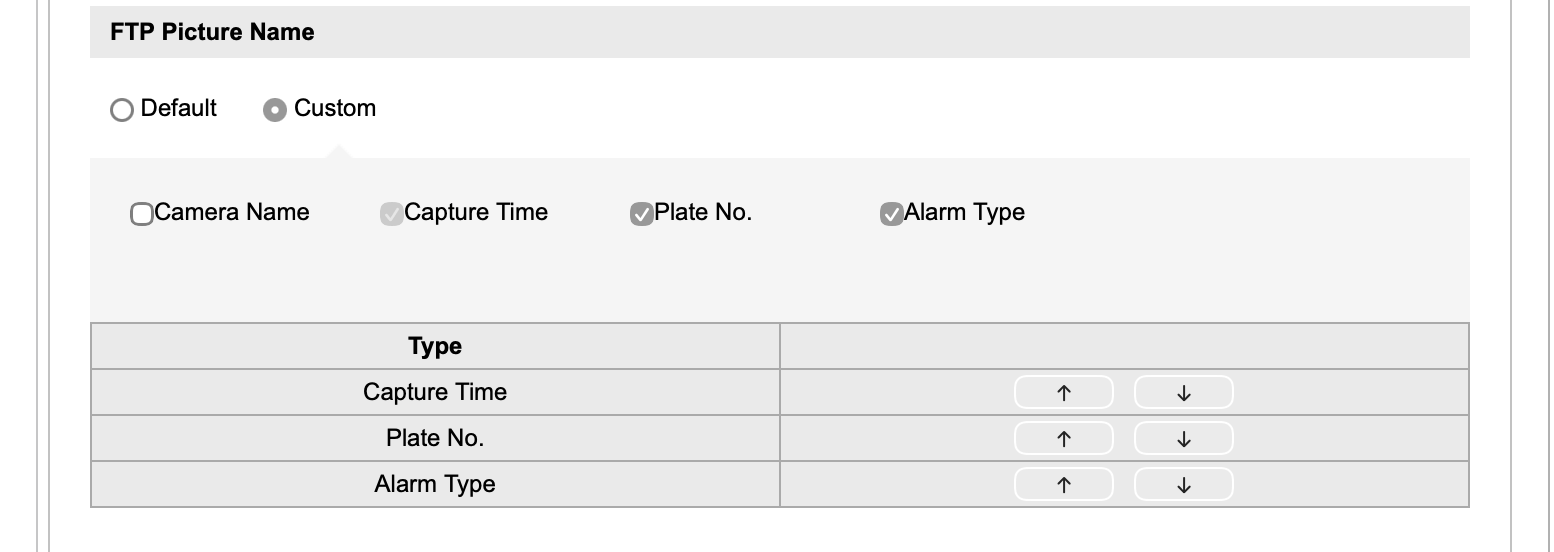
Image Settings
The Hikvision camera has a special set of image settings bundled as a Mounting Scenario
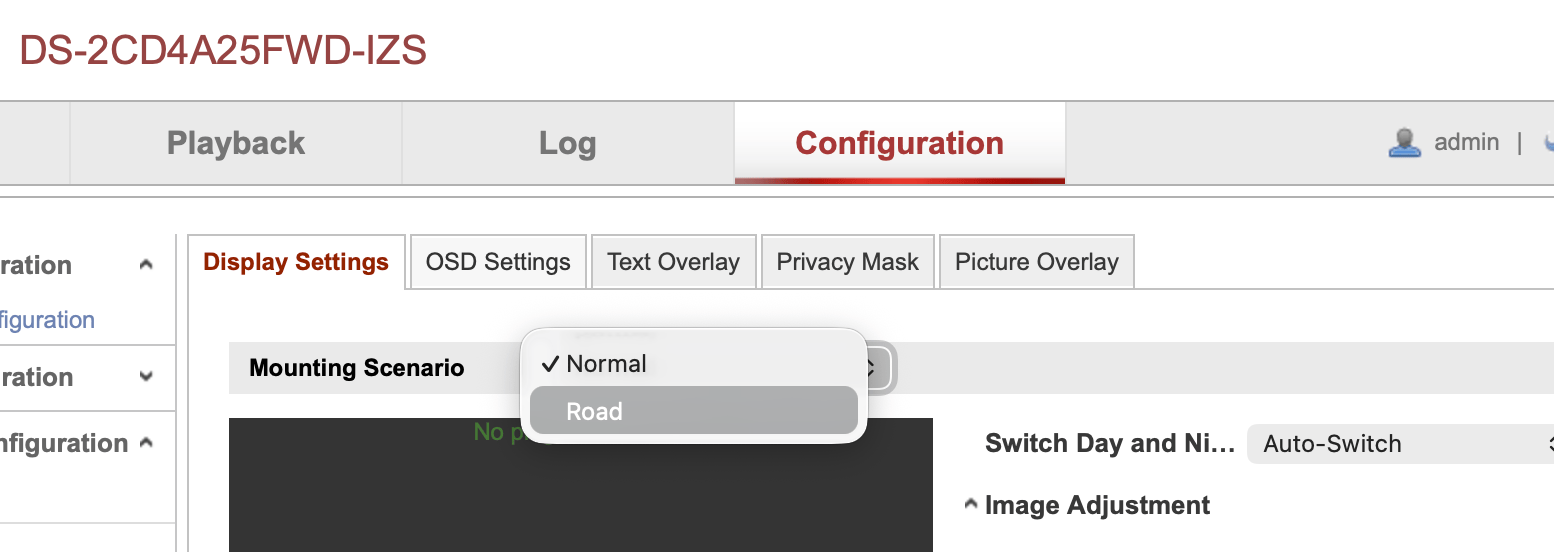
One side-effect of this is that the camera can be practically useless as a general purpose CCTV camera in anything other than very bright conditions if the Road Mounting Scenario is chosen.
One way of coping with this is to switch between mount scenarios, so its Normal at day time and Road at night, or have it on Road only when there is heightened security need.
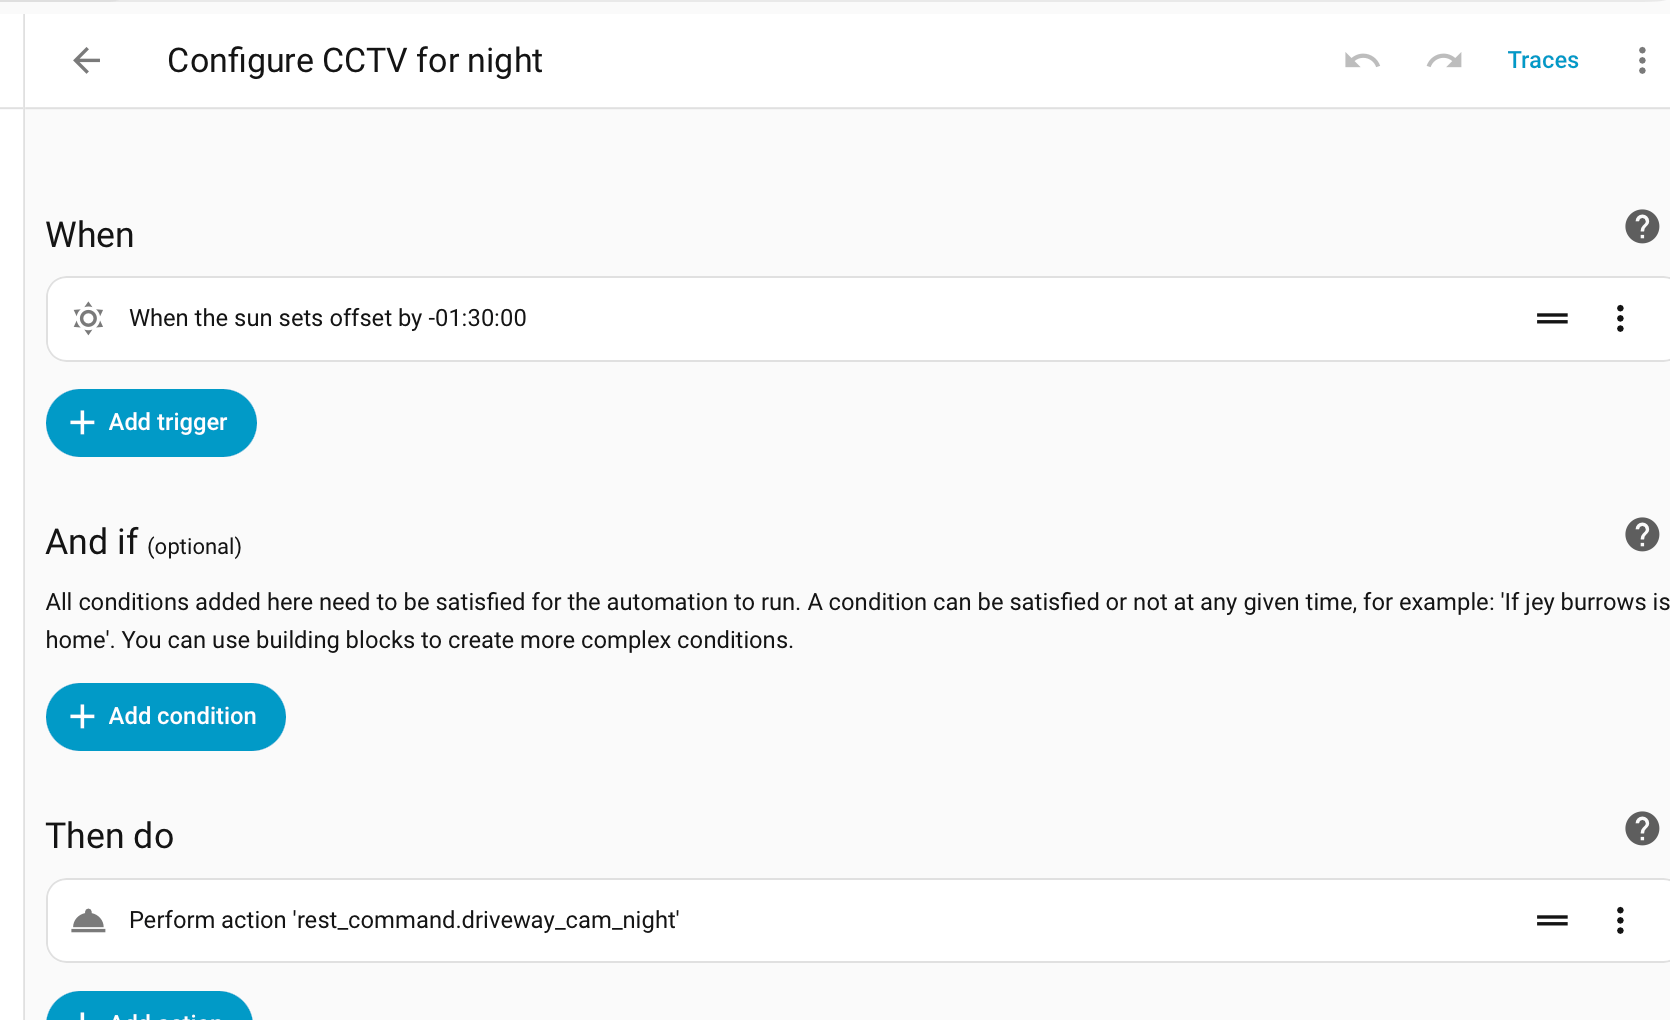
Home Assistant Automated Mount Scenario Change
Set up two REST commands, changing 192.168.1.100 for the IP address or host name of your own camera, and adding hik_user and hik_password values to the secrets.yaml file (see Storing Secrets).
driveway_cam_road:
    url: http://192.168.1.100/ISAPI/Image/channels/1/mountingScenario
    method: put
    content_type: text/xml
    username: !secret hik_user
    password: !secret hik_password
    payload: '<MountingScenario xmlns="http://www.hikvision.com/ver20/XMLSchema" version="2.0"><mode>road</mode></MountingScenario>'

driveway_cam_normal:
    url: http://192.168.1.100/ISAPI/Image/channels/1/mountingScenario
    method: put
    content_type: text/xml
    username: !secret hik_user
    password: !secret hik_password
    payload: '<MountingScenario xmlns="http://www.hikvision.com/ver20/XMLSchema" version="2.0"><mode>normal</mode></MountingScenario>'
These commands can now be used in Home Assistant automations as actions, triggered by time of day, state of sun etc.
Other Cameras
Other Ways to Integrate
- Home Assistant built-in Hikvision Integration
- Has support for 'Surveillance Center' notifications but with open issue #115631 for ANPR integration.